SIGN IN YOUR ACCOUNT TO HAVE ACCESS TO DIFFERENT FEATURES

FORGOT YOUR PASSWORD?

FORGOT YOUR DETAILS?

AAH, WAIT, I REMEMBER NOW!
QUESTIONS? Contact Us | 866-824-4459

ZenTek ConsultantsZenTek Consultants

  • Architecture
    • Services
      • TEK Bloks
      • BIM Services
      • CAD Standards Service
      • Civil 3D Kickstart
      • BricsCAD Pilot Program
      • Moving to BricsCAD
      • Bluebeam Tool Chest Customization Services
      • Construction Support Services
      • Microsoft 365 Implementation
      • Microsoft Teams Services
      • SharePoint Online Services
    • Training Options
      • Autodesk Revit Online Courses
      • AutoCAD Online Courses
      • AutoCAD Civil 3D Online Courses
      • Autodesk 3ds Max Online Courses
      • Autodesk Navisworks Online Courses
      • BricsCAD Online Courses
      • Bluebeam Revu Online Courses
      • Microsoft Online Courses
      • Custom Training
      • Training Waitlist
    • Software
      • BricsCAD
      • Bricsys 24/7
      • Bluebeam Revu
      • Microsoft
  • Engineering
    • Services
      • TEK Bloks
      • CAD Standards Service
      • BIM Services
      • Civil 3D Kickstart
      • BricsCAD Pilot Program
      • Moving to BricsCAD
      • Microsoft 365 Implementation
      • Microsoft Teams Services
      • SharePoint Online Services
    • Training Options
      • AutoCAD Civil 3D Online Courses
      • AutoCAD Online Courses
      • Autodesk Revit Online Courses
      • BricsCAD Online Courses
      • Civil Site Design Online Courses
      • Bluebeam Revu Online Courses
      • Microsoft Online Courses
      • Custom Training
      • Training Waitlist
    • Software
      • Civil Site Design
      • Stringer Topo
      • BricsCAD
      • Bricsys 24/7
      • Bluebeam Revu
      • Microsoft
  • Construction
    • Services
      • TEK Bloks
      • Bluebeam Tool Chest Customization Services
      • Construction Support Services
      • Services for Procore
      • BIM Services
      • CAD Standards Service
      • Civil 3D Kickstart
      • BricsCAD Pilot Program
      • Moving to BricsCAD
      • Microsoft 365 Implementation
      • Microsoft Teams Services
      • SharePoint Online Services
    • Training Options
      • Bluebeam Revu Online Courses
      • Procore Online Courses
      • AutoCAD Online Courses
      • Autodesk Revit Online Courses
      • Autodesk Navisworks Online Courses
      • Autodesk 3ds Max Online Courses
      • AutoCAD Civil 3D Online Courses
      • BricsCAD Online Courses
      • Civil Site Design Online Courses
      • Microsoft Online Courses
      • Custom Training
      • Training Waitlist
    • Software
      • Bluebeam Revu
      • ZenEstimate Tools
      • ZenTek Revu Tools
      • Procore
      • Civil Site Design
      • Stringer Topo
      • BricsCAD
      • Bricsys 24/7
      • Microsoft
  • Manufacturing
    • Training Options
      • AutoCAD Online Courses
      • BricsCAD Online Courses
      • Microsoft Online Courses
      • Custom Training
      • Training Waitlist
    • Software
      • BricsCAD
      • Bricsys 24/7
      • Bluebeam Revu
      • Microsoft
  • Events
    • Upcoming Events
    • Live Webinars
    • On-Demand Webinars
  • Resources
    • Blog
    • The CADDLE Call Podcast
    • YouTube Channel
    • Planswift Training: Planswift Pros
    • Promotions
  • About Us
    • News
    • Contact Us

Autodesk Revit Curtain Wall Secrets Revealed

ZenTek Consultants
Wednesday, 27 February 2019 / Published in AEC, Autodesk Revit

Autodesk Revit Curtain Wall Secrets Revealed

Revit Curtain Walls

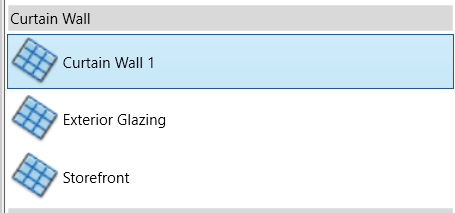
Curtain walls are often multi-functional in Revit, typically used for non-bearing, aluminum-framed walls defined by grids and mullions. Revit contains three different default curtain walls – Curtain Wall 1(the most basic unaltered curtain wall), Exterior Glazing (with preset grids), and Storefront (with preset grids and mullions).

Revit Curtain Walls

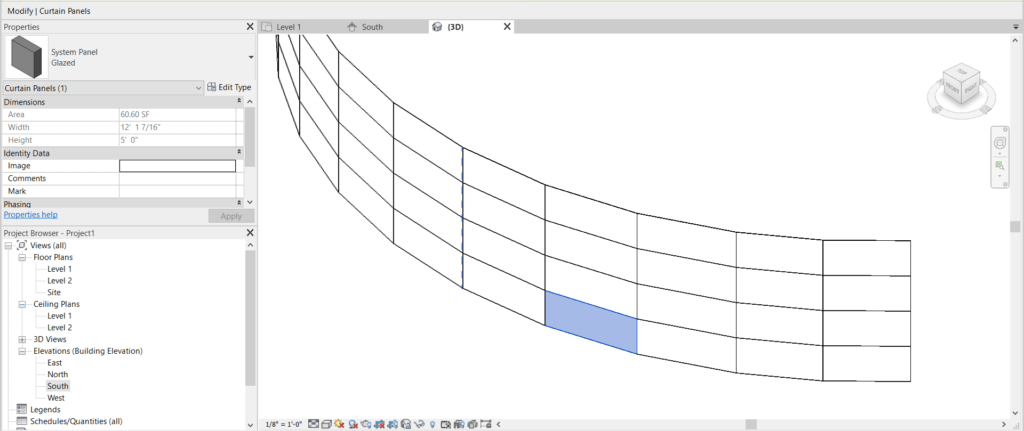
The most versatile and easiest to customize is the Curtain Wall 1. When placing a Curtain Wall 1, follow this process. Create the Curtain Wall (located on the Wall dropdown of the Properties dialog box, at the bottom of the list) by setting the desired height and selecting the start and end points of the wall. The cursor will automatically snap to the centerline of the wall. Once placed, open an elevation view of the wall.

In the elevation view, select Curtain Grid, on the Build panel of the Architecture tab. As the mouse moves over a vertical boundary (left or right side) of the curtain wall, click to place the horizontal grid; do the same for the vertical grid, hovering over the horizontal boundary (top or bottom) of the wall. Use the Add or Remove Segments tool to remove portions of the grid that are not needed. For example if a grid line crosses a door, remove the segments that cross the door grid.

Revit Curtain Walls

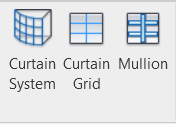
Once the grid is placed, Mullions can be added to the grid, either to the entire wall or to grid segments as required. The biggest tripping hazard (pun intended) occurs when mullions are placed at the bottom of a door panel. These should be deleted, keeping in mind the mullions may need to be “unpinned” to delete. Mullions will not move and cannot be dragged…move the grid line to modify the mullions.

Speaking of doors, curtain wall doors in Revit are a Panel Type. Select the panel in the curtain wall and replace the panel with a Curtain Wall Door in the Properties dialog box. Curtain wall panels can be changed to any wall type, so it is possible to place regular Revit doors in a curtain panel wall. Just be sure to check the mullions and frames for constructability.

Revit Curtain Walls

Curtain Walls can be used in other ways beyond a wall product. For example, use a curtain wall to create a custom railing with glass panels. It works so much easier than a Railing in Revit! The only drawback is that it will not schedule or populate quantities as a railing, but for presentation purposes makes a decent substitute.

Regardless of the type of Curtain Wall being used, remember the process. Create the wall centerline first, then Grids, Mullions and Panels. Breaking the curtain wall down into those steps makes creating a curtain wall in Revit easy.

What you can read next

Procore Certified Consultant
Setting Up Procore Cost Codes and Cost Types
AutoCAD Civil 3D Grading
Grading with Corridors in AutoCAD Civil 3D®
Train to Retain
AEC Tech Workers are in High Demand – How to Retain Your Employees

Leave a Reply Cancel reply

Your email address will not be published. Required fields are marked *

Recent Posts

  • Gradings in AutoCAD Civil 3D

  • The CADDle Call podcast

    What’s New in the Autodesk World

  • Easy Electrical Circuits Using Revit

  • The CADDle Call podcast

    Young Engineers & Designers – What’s Missing from Their Education

  • Bluebeam Revu: Creating a Master Table of Contents

Categories

Archives

  • Services
  • Software
  • Online Training
  • Leasing Options
  • About Us
  • Contact Us
  • Privacy Policy
  • Events
  • The CADDle Call Podcast
  • Blog
  • YouTube Channel
  • Promotions
  • Subscribe to Emails

Official Bricsys Reseller

Bluebeam Partner

Procore Certified Consultant

ACCNJ Member

  • GET SOCIAL

©2016 - 2021 ZENTEK. LLC TOP